 |
| This is a screenshot of my terminal after I started the hotspot |
UPDATE: I SAW A PROBLEM! I DONT KNOW YET WHY, BUT IF YOU RUN THE SCRIPT, THE ANDROID TERMINAL FIND THE NETWORK BUT WHEN TRYING TO CONNECT IT STOPS AT OBTAINING IP ADDRESS. ILL TRY TO FIND WHY THIS HAPPENS...
Ok, I installed Fedora 18 on my laptop, I can say that I returned to the Linux distribution that I always loved, and I found a problem. I didnt know how to create a non ad-hoc hotspot.
So I tried the method that worked for me on Ubuntu and about I wrote an article HERE and I found that also work on Fedora, with a few modifications.
I should post the modified code:
1. install hostapd and dnsmasq by typing sudo yum install hostapd dnsmasq
2. stop those services: sudo service hostapd stop and sudo service dnsmasq stop
3. configure the dnsmasq.conf by typing sudo gedit (or other text editor) /etc/dnsmasq.conf:
# Bind to only one interface
bind-interfaces
# Choose interface for binding
interface=wlan0
# Specify range of IP addresses for DHCP leasses
dhcp-range=192.168.150.2,192.168.150.10
# Choose interface for binding
interface=wlan0
# Specify range of IP addresses for DHCP leasses
dhcp-range=192.168.150.2,192.168.150.10
4. configure the hostapd.conf: sudo gedit /etc/hostapd/hostapd.conf
# Define interface
interface=wlan0
# Select driver
driver=nl80211
# Set access point name
ssid=myhotspot
# Set access point harware mode to 802.11g
hw_mode=g
# Set WIFI channel (can be easily changed)
channel=6
# Enable WPA2 only (1 for WPA, 2 for WPA2, 3 for WPA + WPA2)
wpa=2
wpa_passphrase=mypassword
5. create a bash file and paste the following code:
#!/bin/bash
# Start
# Configure IP address for WLAN
sudo ifconfig wlan0 192.168.150.1
# Start DHCP/DNS server
sudo service dnsmasq restart
# Enable routing
sudo sysctl net.ipv4.ip_forward=1
# Enable NAT
sudo iptables -t nat -A POSTROUTING -o ppp0 -j MASQUERADE
# Run access point daemon
sudo hostapd /etc/hostapd/hostapd.conf
# Stop
# Disable NAT
sudo iptables -D POSTROUTING -t nat -o ppp0 -j MASQUERADE
# Disable routing
sudo sysctl net.ipv4.ip_forward=0
# Disable DHCP/DNS server
sudo service dnsmasq stop
sudo service hostapd stop
6. grant permissions and run the script!
 |
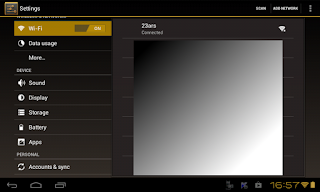
| This is a screenshot from my tablet! |


+APK+%E2%80%93+Android+Game+by+Wooga.jpg)

0 comments:
Post a Comment